Audio-Video Recorders
The department has a set of portable audio and video recorders available for borrowing. You should reserve the equipment on MRBS and pick it up from ECE Stores in MCLD 112B. (Please remember to reserve enough time in your booking to copy the files to your computer, unless you record to your own microSD card.)
Audio Recorder Kits
Each audio recorder kit consists of:
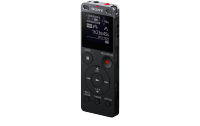
- Sony ICD-UX560
- Lavalier clip microphone (with 3.5mm TRRS connector)
- 3.5mm TRRS-to-TRS adapter
- Carrying case
The Sony ICD-UX560 produces audio files with MP3 compression (192 kbps, 128kbps, or 48 kbps) or uncompressed audio in LPCM format.
The recorder has 4 GB of built-in storage, accessible via the USB-A connector. Alternatively, you can insert your own microSD card.
To record:
- Retract the USB-A connector.
- Momentarily slide the power switch.
- Plug the microphone into the adapter dongle, and the adapter into the microphone port.
- Press the Record 🔴 button. The audio level meters on the display should confirm that it is recording.
After recording:
- Extend the USB-A connector, and plug it into your computer.
- Copy your audio file to your computer.
- Delete your audio file from the recorder using the computer (or press OPTION → Delete a File).
- Slide and hold the power switch to turn the recorder off.
Video Recorder Kits
Each video recorder kit consists of:
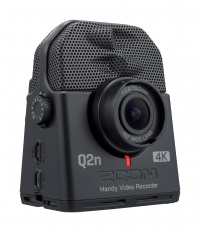
- Zoom Q2n-4K
- Sandisk high-endurance microSDHC card, 32 GB
- microSD-to-SD adapter
- USB A to Micro-USB cable, 2 m
- USB power adapter
- Desktop tripod
- Carrying case
The Zoom Q2n-4K produces video files in an MP4 container (.MOV file extension) with H.264 compression.
To record:
- Plug in the USB power source. (The unit can also be powered by 2 AA batteries.)
- Press the Play ▶️ button to turn on the recorder.
- Twist the lens cap off.
- Use the VIDEO button to select the video resolution (1080∙30 is recommended). The estimated available recording length is displayed.
- Use the FOV button to adjust the zoom.
- Set the AUTO GAIN mode to MEETING. (Alternatively, if auto gain is off, turn the knob such that the peak audio level is at -12 dB.)
- Press the Record 🔴 button. The timer should start counting up.
After recording:
- Press the Record 🔴 button to stop recording.
- Twist the lens cap on.
- Connect the unit to your computer via USB.
- Turn the recorder off (hold down the Play ▶️ button), then turn in on again.
- Select the Card Reader mode (press FOV, then press Record 🔴 twice).
- Copy your video file to your computer. (Note that long recordings will be split into multiple 4 GiB chunks.)
- Delete your video file from the recorder using the computer (or press Play ▶️, LO CUT 🗑, VIDEO ✓, LO CUT 🗑, Record 🔴).
- Turn the recorder off (hold down the Play ▶️ button).
Alternatively, you can put the microSD card in your computer — but please remember to put it back into the recorder afterwards! The microSD card slot is in the middle of the battery compartment on the bottom of the recorder.

