Difference between revisions of "How To Configure Thunderbird"
(New Page) |
|||
| (One intermediate revision by one other user not shown) | |||
| Line 4: | Line 4: | ||
These instructions are for | These instructions are for | ||
[http://www.mozilla.com/thunderbird/ Mozilla Thunderbird] 2.0. | [http://www.mozilla.com/thunderbird/ Mozilla Thunderbird] 2.0. | ||
| − | |||
| − | |||
| − | |||
==The New Account Wizard== | ==The New Account Wizard== | ||
| Line 56: | Line 53: | ||
==See Also== | ==See Also== | ||
* [[Email Quick Start]] | * [[Email Quick Start]] | ||
| − | |||
* [[How To Configure Your Email Client]] | * [[How To Configure Your Email Client]] | ||
Latest revision as of 09:50, 20 August 2021
These instructions are for
Mozilla Thunderbird 2.0.
The New Account Wizard
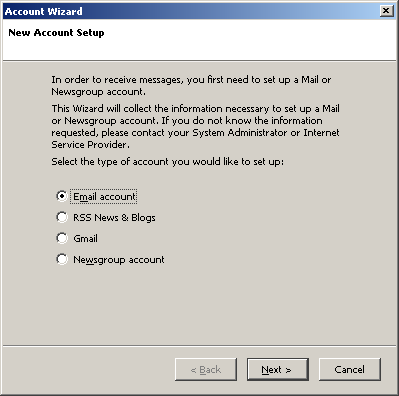
To enter the New Account Wizard, use the Tools menu to select Account Settings.... Click the Add Account... button. (The first time you launch Thunderbird, you will enter the New Account Wizard automatically.)
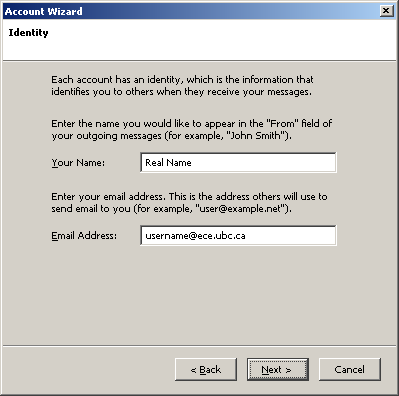
Enter your real name and your e-mail address (which is username@ece.ubc.ca).
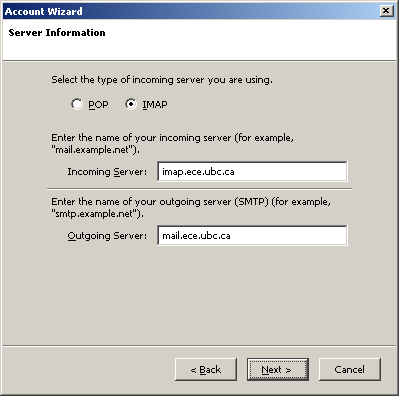
Then instruct Thunderbird to use the ECE mail servers, imap.ece.ubc.ca and mail.ece.ubc.ca.
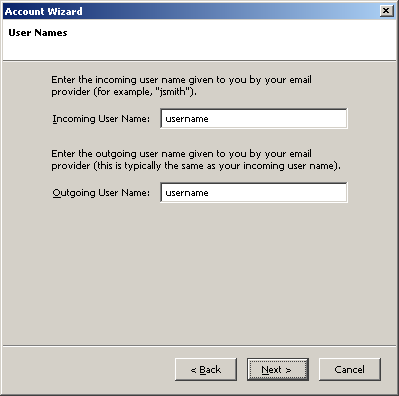
Enter your username twice.
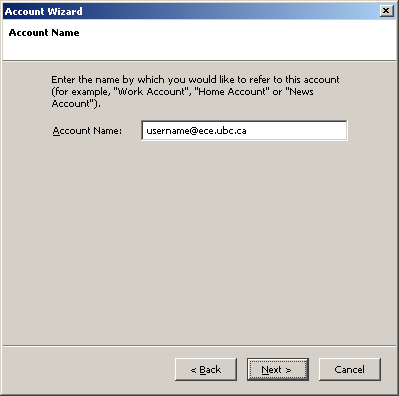
Give a name under which to save the configuration. You can call it whatever you wish; the suggested default works.
More Configuration Steps
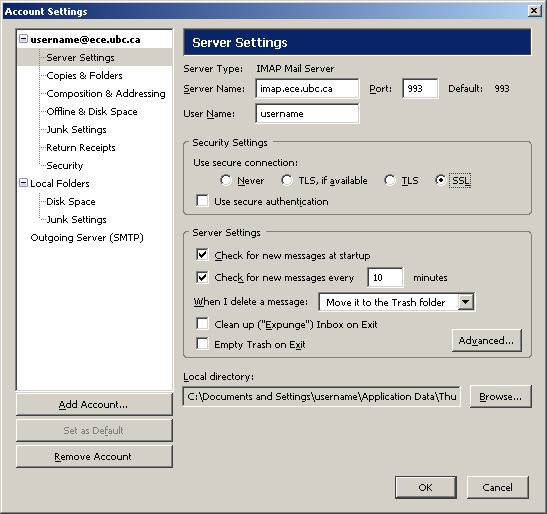
Since the New Account Wizard does not prompt you for the required encryption settings, the first attempt to connect to the server will fail. You will need to enter these settings manually through the Account Settings screen (which you can bring up using Tools > Account Settings...).
Under Server Settings, choose SSL. This will automatically change the port number to 993.
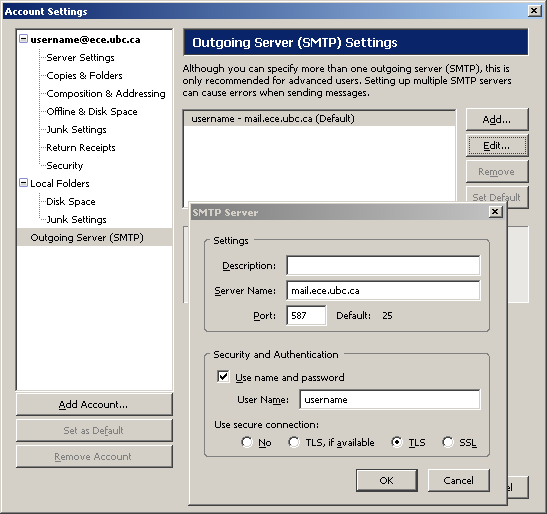
Under Outgoing Server (SMTP), select the mail.ece.ubc.ca server and click Edit.... In the dialog, select TLS and change the port to 587.
