Difference between revisions of "How To Configure Apple Mail"
(New Page) |
|||
| Line 3: | Line 3: | ||
These instructions are for Apple Mail 2.1.2, the version included with Mac OS X | These instructions are for Apple Mail 2.1.2, the version included with Mac OS X | ||
| − | 10.4 ("Tiger") | + | 10.4 ("Tiger"). |
Revision as of 09:49, 20 August 2021
These instructions are for Apple Mail 2.1.2, the version included with Mac OS X
10.4 ("Tiger").
The New Account Wizard
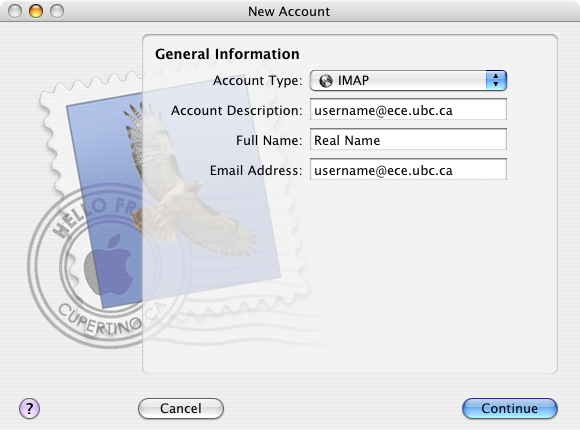
To enter the New Account Wizard, select the Mail > Preferences menu item, select the Accounts pane, then click the + button. (The first time you launch Mail, you will enter the New Account Wizard automatically.)
Select IMAP for the Account Type. The Account Description can be anything you want. Also enter your real name and your e-mail address (which is username@ece.ubc.ca).
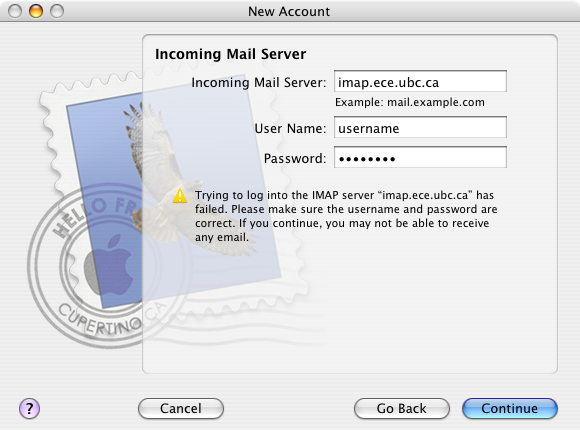
The Incoming Mail Server is imap.ece.ubc.ca. Enter the username and password of your ECE account, and click Continue. It will try to connect to the IMAP server, then fail after a few seconds. This is normal, since the ECE server requires SSL, which you have not configured yet.
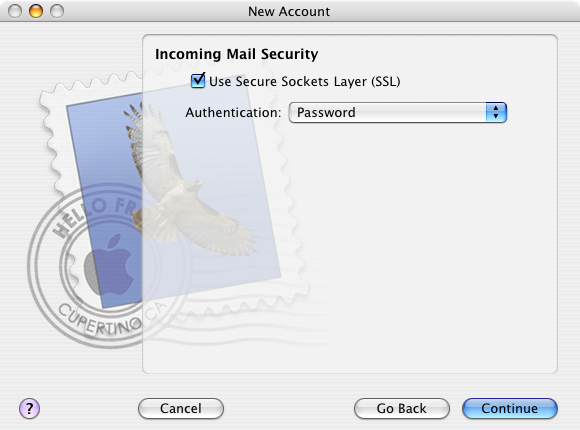
Click Continue again, at which point it asks you about using SSL for incoming mail. (Had the application been properly designed, it would have asked before trying and failing to connect without SSL.)
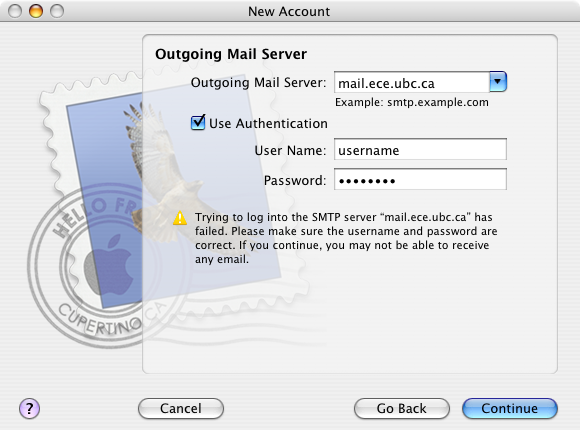
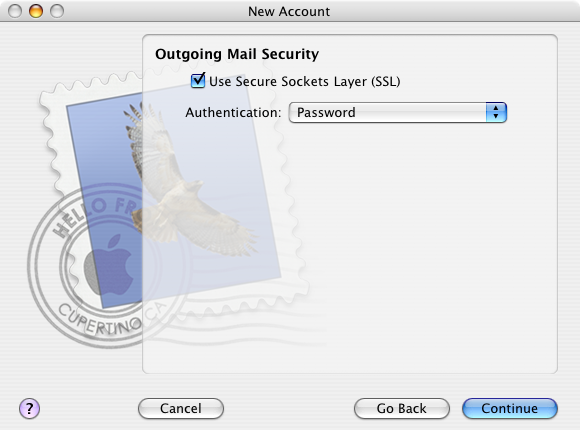
Configure the Outgoing Mail Server as mail.ece.ubc.ca. Tick Use Authentication, and enter your ECE username and password. Again, click Continue, wait for it to fail, then click Continue again.
To finish the configuration, select SSL for outgoing mail.
